
Ever since my lovely daughter started going through 4-5 jars of 1st Foods Carrots, Apple and Sweet Potato, I've been having a hard time disposing of the jars. In other words, I finally got a good excuse to try one of the awesome Pinterest tutorials I've been salivating over for months. Only today, I'm sharing with you the mini version of the glitter jar tutorial :)
What you'll need:

- Gerber Baby Food jars or any other small jars
- Mod Podge
- Foam Brush
- Glitter
- Strings, Beads, Charms, or anything else you want to decorate it with (optional)
Step by Step Walk-through
1) Peel off the labels from the jars. Don't worry about getting the glue off, it really won't matter in the end.
2) Using the foam brush, cover the jar in a nice and even coat of Modge Pod

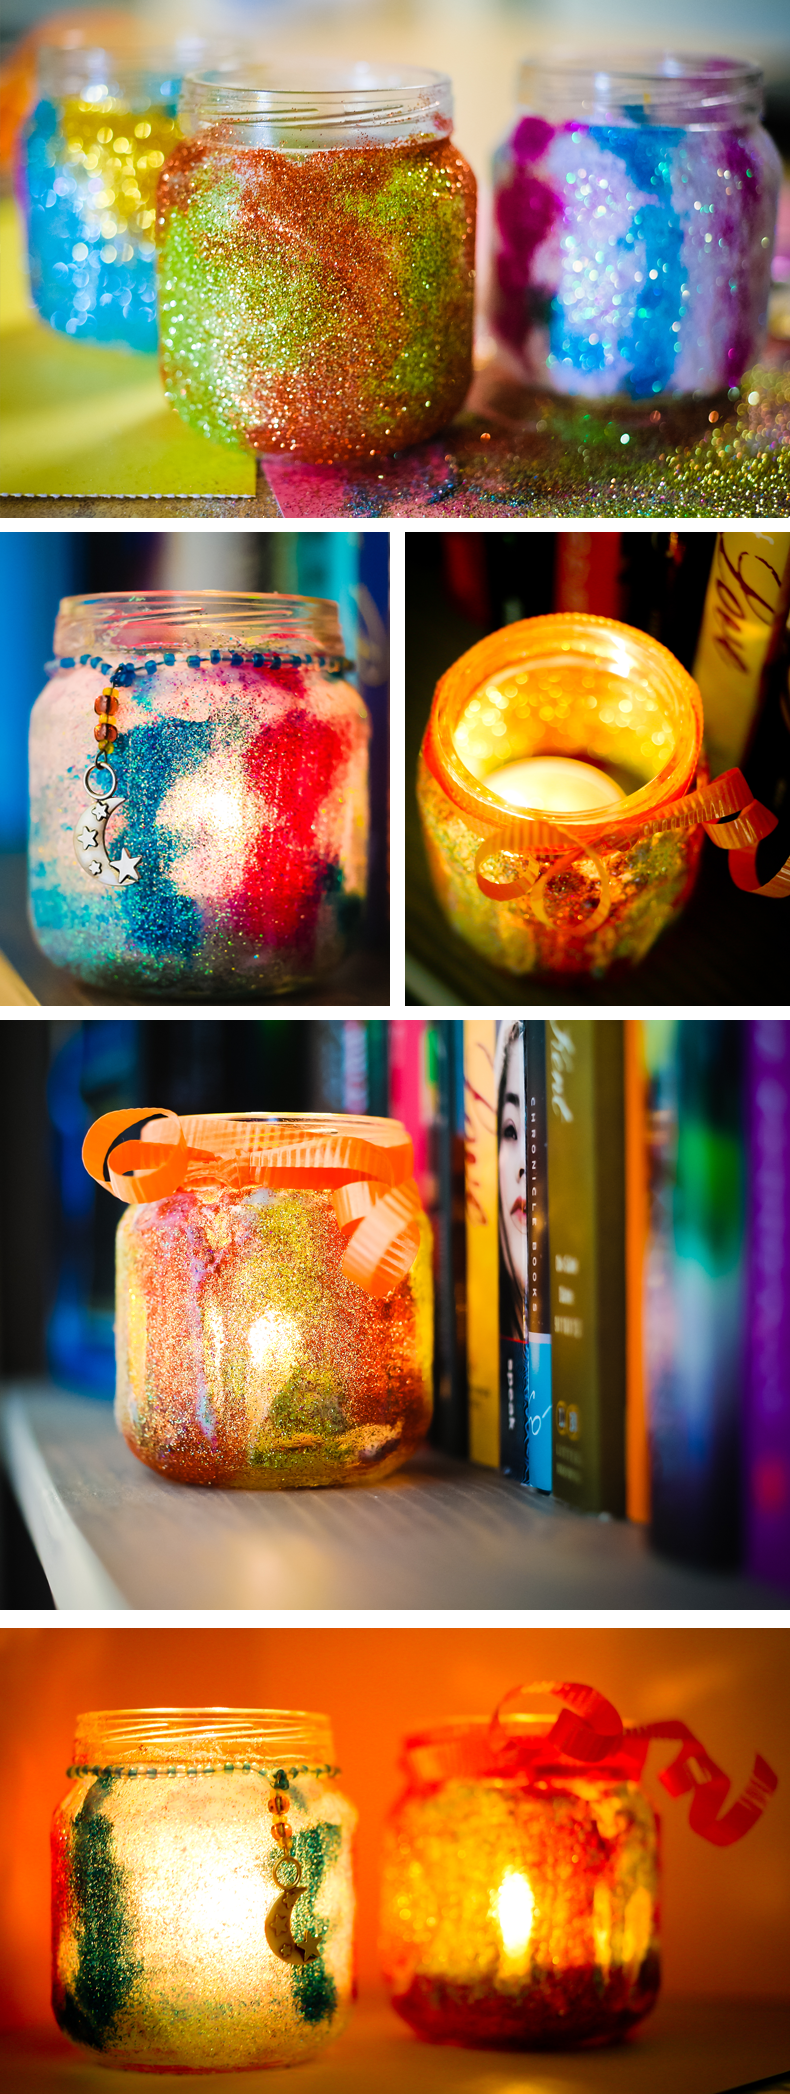
3) Apply glitter. Shake it a bit to even out the coat. Use a newspaper or some other piece of paper underneath for the glitter that will inevitably fall down.

4) Wait about 2-3 hours for the Mod Podge to dry, then apply a top coat of Mod Podge to keep the glitter in place. Allow to dry completely for about 3-4 hours. Side note: Mod Podge goes on white, but it clears up 100% once it dries.

5) Decorate with whatever sparkly, shiny, pretty things you have on hand :)


 Hi there! I'm Evie! I'm a 20-something year old wife and mom to a beautiful baby-girl, Victoria. I am an avid reader, graphic designer and craft-loving, Supernatural and The Walking Dead obsessed coffee-lover. I love writing about my family, sharing honest opinions about products and services, and socializing with other moms and readers (or reader moms!).


Love them I could do this with my daughter and she would love doing them too
ReplyDeleteI should these to Lucy and got many oohss and ahhhss and can we make these? I've pinned it and am thinking it would be something really fun to do with her.
ReplyDeleteThese are so cute. My daughter loves making little gifts for the family at Christmas, these would be perfect.
ReplyDeleteThese are great! Perfect camping project for the kids!
ReplyDeleteThis is so cute! Would be a nice project to do with my daughter.
ReplyDelete